This blog is part of the Analyzing Scoliosis series, which is designed to teach movement practitioners how to work confidently with clients who have scoliosis. To start at the first post in the series, go here. My book, Analyzing Scoliosis, which covers the topics in this series in more depth (as well as others), is available on Amazon.
What is padding and why does it matter?
Did you know that simply placing an object under the back, in a specific place while lying down, can help decrease the rotation and curvature in the spine? It’s true, and I’ll call that “something” placed under the back a pad. Using padding while working out has been an invaluable tool for my scoliosis and that of my clients.
The purpose of using a pad is to help your spine move into a more neutral alignment and to lessen the rotation or lateral curve, depending on the position you’re lying in, for your spine.
Padding Materials
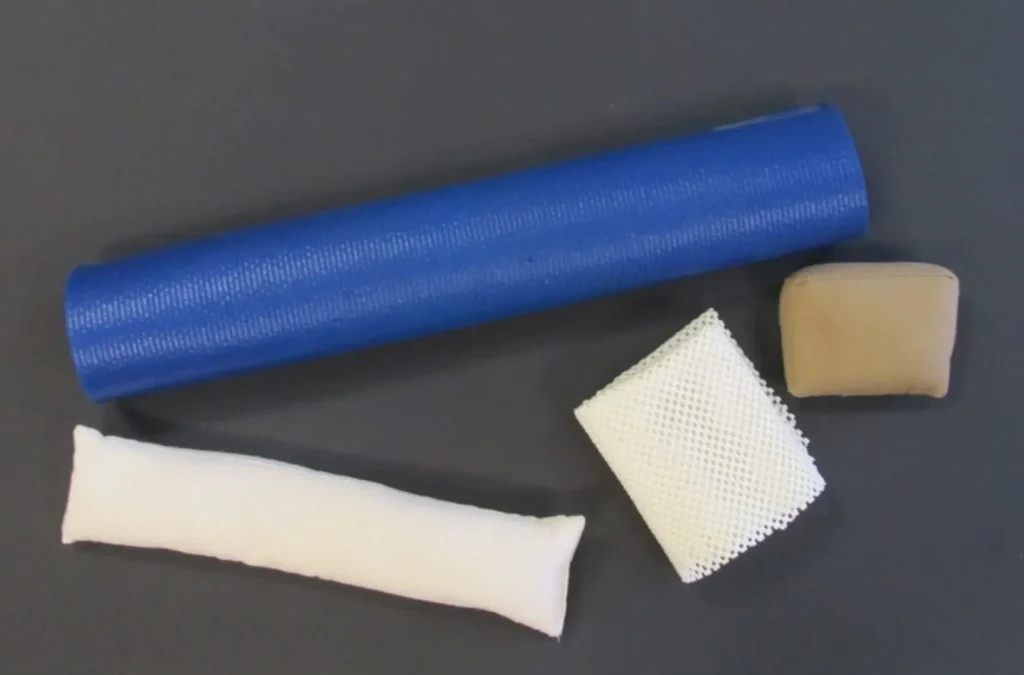
My favorite pad material while lying on your back or front is folded up shelf liner—something almost every Pilates instructor already has in their studio. Most of us in the industry call them “stickies.” I can make my pads as thick or as thin as I want by adding or taking away pieces of shelf liner or folding it in different ways. The material’s non-skid properties hold it in place while working on a Mat or Reformer—which is very important if your pads are going to be effective.
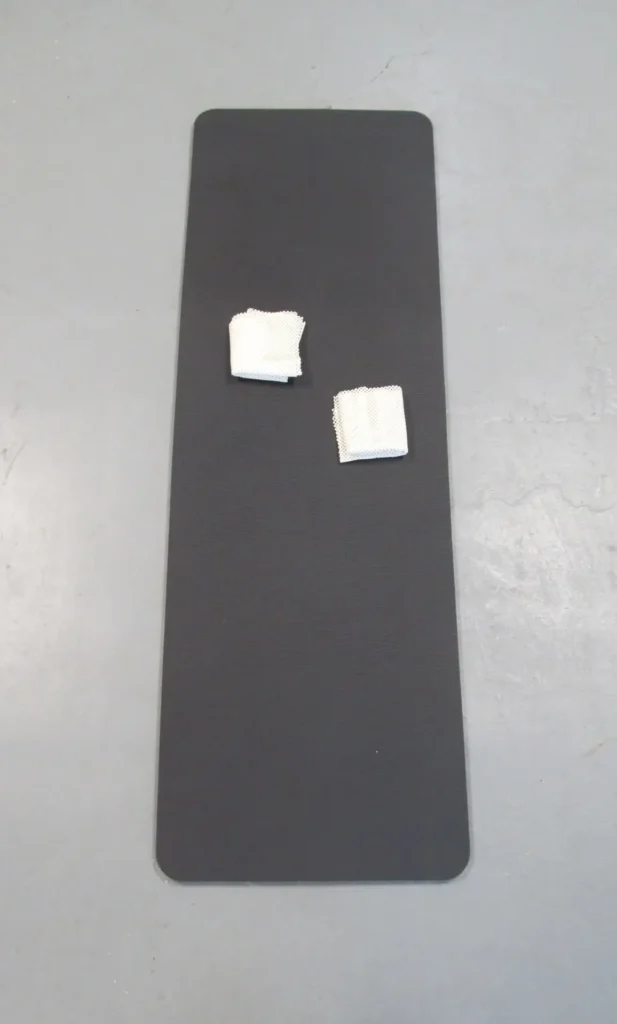
In my studio, I have multiple pieces of shelf liner that I cut down to about 1 1/2 feet by 1 foot. I like to put two pieces on top of each other, and then fold them a few times to create a pad about an inch thick and the roughly size of my hand.
Depending upon how mobile your or your client’s spine is, you can always add or take away padding. If the spine is pretty mobile, try adding another piece of shelf liner (before folding it all up) to more aggressively push and de-rotate the spine. The opposite is also true; if the spine is just not moving and is in pain, take one of the pieces of shelf liner out to make the pad thinner. Successful padding means being able to breathe and comfortably lay on the pads for the duration of the exercises being done.
If you don’t have shelf liner at your disposal, use a folded towel or even a portion of a sweatshirt that’s rolled up. It doesn’t need to be fancy. I’ve been known to take my socks off, make a ball out of them, and put them under my own back if I have nothing else to use as a pad for my scoli. Padding material isn’t super important, it’s the placement of the pads you want to be sure you’ve got right.
How to Pad Scoliosis
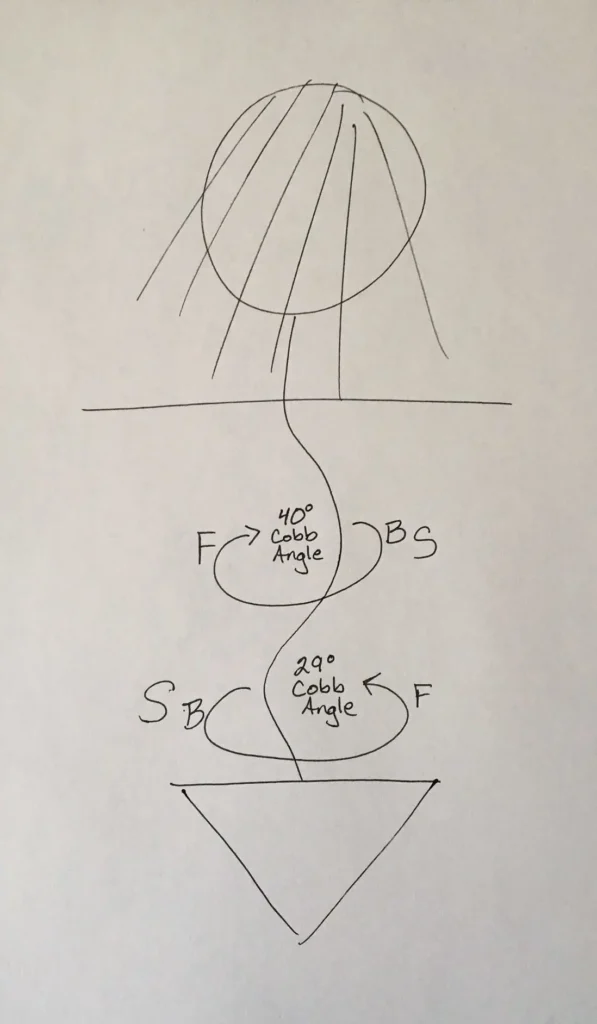
Let’s move on to how to pad scoliosis. On the diagram sketch you previously created, you’ll want to make notes of where to place pads when you are in different body positions. I use a system of letters to keep track of these placements.
B is for Back Lying
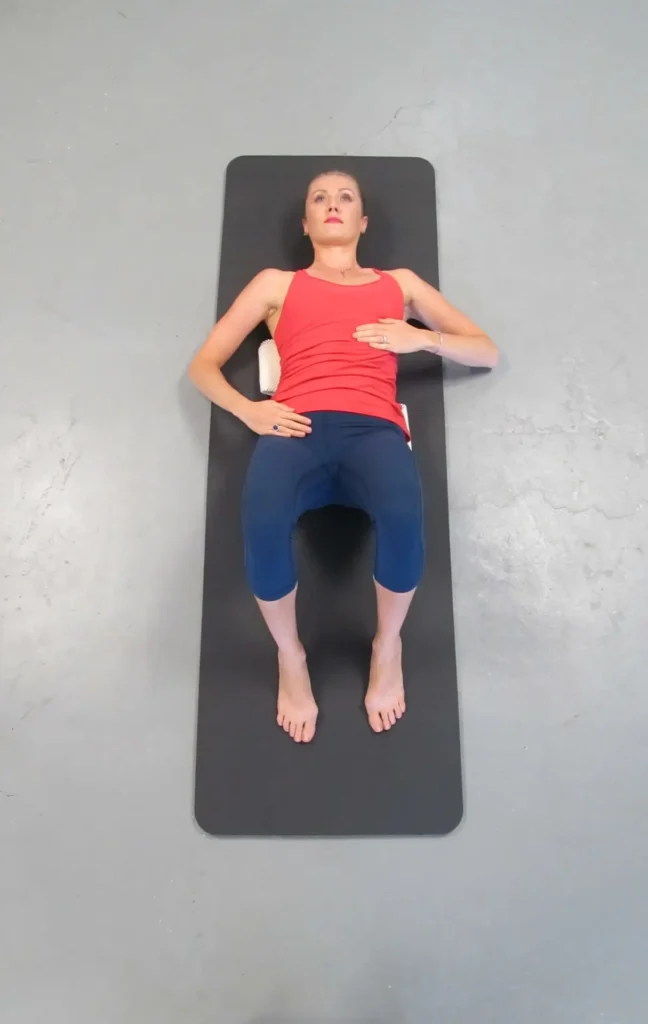
While lying on the back, place a pad where the spine is rotating towards the ground. This is the convex side of the scoli curve. Make sure the pad is at the most sideways part of the curve (the same vertebral level where the apex of the curve is). This encourages the part of the body that is trying to rotate backwards to move forward in space. It also allows the part of the body that is trying to rotate forwards to drop back in space from the weight of gravity. If there is more than one rotation, you will need to repeat this process for each curve. In the sketch below, I wrote a “B” for where I need to place a pad while laying on my back.
F is for Front Lying
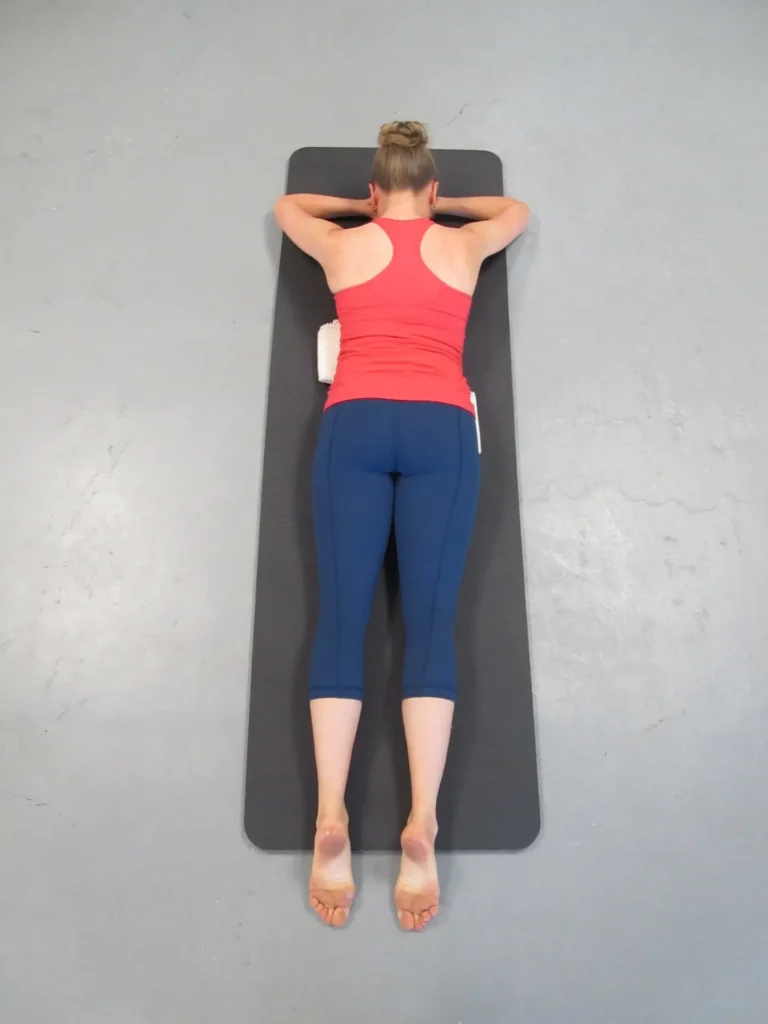
Padding front lying will be the exact opposite of padding back lying. Try flipping over onto the front without moving the pads, you should notice the pads are in the correct place. The goal is to move the spine and rib cage into a more neutral alignment, so check in on each curve to ensure that the padding is de-rotating you or your client. In the sketch, I wrote a “F” for where I need to place a pad while laying on my front.


S is for Side lying
While side lying, I like to use a rolled-up yoga mat, rice bag, or sometimes a combination of the two for padding. I find that most bodies like a larger pad while side lying than what they used for back and front padding. The easiest way to think about side padding is to simply lay on the back pads then roll onto either side. The right side pad will be in the same place as any padding on the ride side of the spine while laying on the back. In the sketch below, I wrote a “S” for where I need to place a pad while laying on my side.
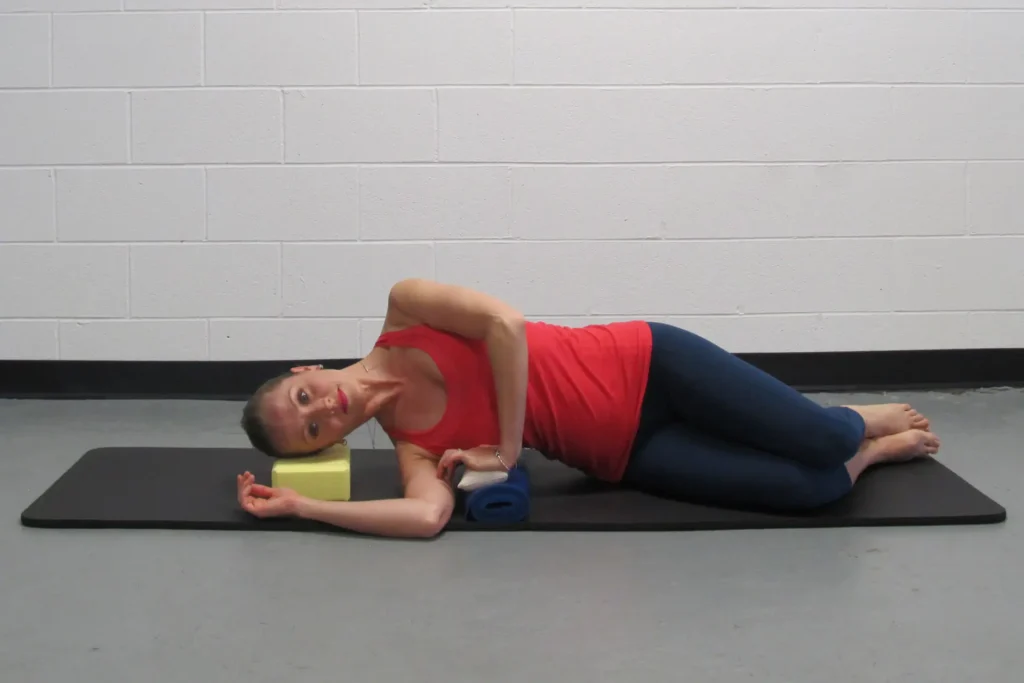
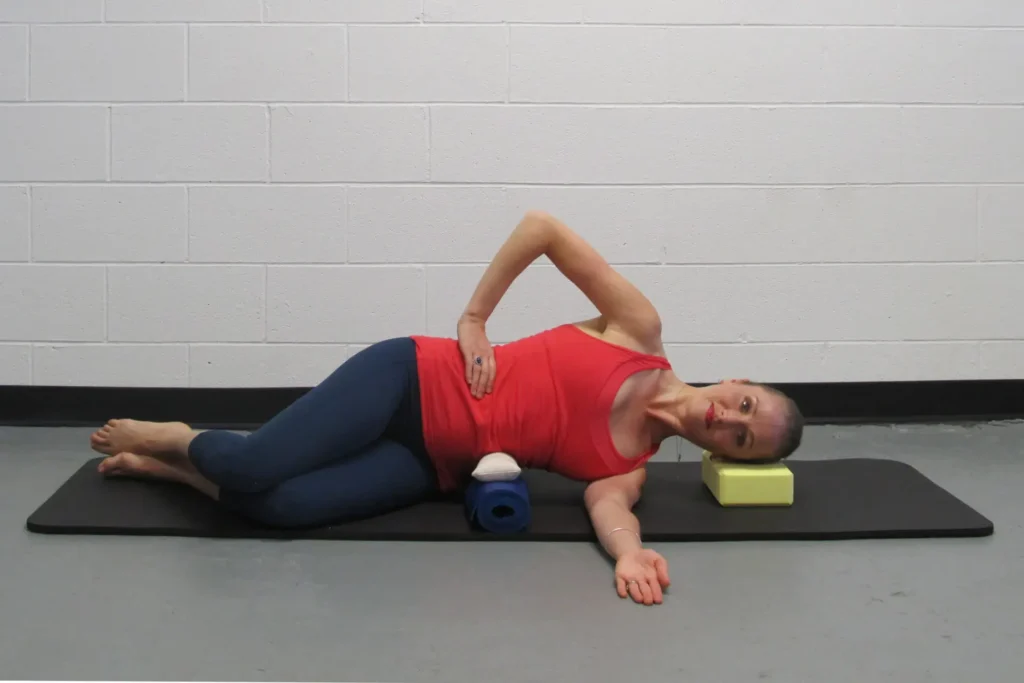
It usually takes a little bit of time to figure out padding, but it’s worthwhile. The relief felt from well placed pads is simply wonderful for most people with scoliosis.
Ready to pad? Grab your diagram sketch and get to work! Still have questions on how to pad scoliosis? My staff and I are always available for virtual lessons; just come prepared with your list of questions and we will work through them with you. Book a virtual lesson.
Stay tuned for the next post about analyzing scoliosis: using a scoliometer.
7 Responses
Where do I buy shelf liner from to make pads
You can buy shelf liner at Walmart.
Hi Stuart,
Shelf liner can be purchased at a grocery store or any any big box, department stores. You’ll be surprised at how many places sell cheap shelf-liner. Also, you don’t need to use shelf-liner for pads. You can simply use wash clothes, kitchen towels, or I’ve even been known to take my socks off, ball them up, and put them under the convex part of my back.
Blessings,
Erin
I love this information thank you but wanted to be sure I am understanding correctly. because in your sketch the two places where the b is does not match up with where the pads are on the mat and and how then you are lying on your back. I see how they line up with the f and the s. So are the pictures for back incorrect or what am I missing? Thank you
Hi Diane,
I just double checked and the B and back pad actually do line up. The key is looking at the hair on the diagram, meaning you have to flip the diagram over because the in the picture I’m face up (a smiley face would be on the diagram) not face down (hair is what’s shown on the diagram). The back pads always go on the convex side of the curves (when you’re face up). The front pads go on the concave side of the curve (when you’re face down and hair is what you see on the head in the diagram sketch). I hope this clears things up for you. If you’re still confused and need clarity for your own body my staff and I would be happy to do a virtual lesson with you.
Blessings,
Erin Myers
Can you use padding with the Motr
Hi Julie,
I really like the MOTR, and it can be great for people with scoli, but since you move around a lot of the MOTR you’ll have to evaluate each exercise as to whether you can pad or not. There are many exercises that you can pad using the MOTR, but also some that you can’t pad. I know that was a very ambivalent answer, but I would still encourage you to get a MOTR for home use if a reformer is out of your price range or you don’t have space for one.
Erin