
This blog is part of the Analyzing Scoliosis series, which is designed to teach movement practitioners how to work confidently with clients who have scoliosis. In previous posts I discussed the typical scoli body, common types of scoli (AIS and functional scoliosis), when to work with a client, handling a misdiagnosed client, the importance of movement, the role of the instructor, assembling your dream team, and the analysis process. My book, Analyzing Scoliosis, which covers the topics in this series (as well as others) in more depth, is available on Amazon.
Now I want to teach you how to use your own senses and body knowledge to take a deeper look at your scoli client’s spine. Before you perform this assessment, put aside any assumptions you may have made about your client’s spine. Simply let the body show you where it is in space.
Spinal Assessment
To begin, have your client stand in front of you and face away from you. With your dominant hand, make a “peace sign.” Put those two fingers at the base of their head, on either side of their vertebrae (your fingers will be on either side of the spinous process).
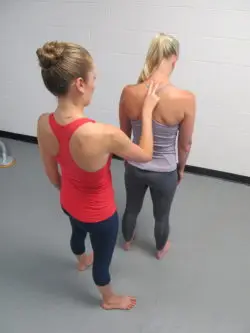
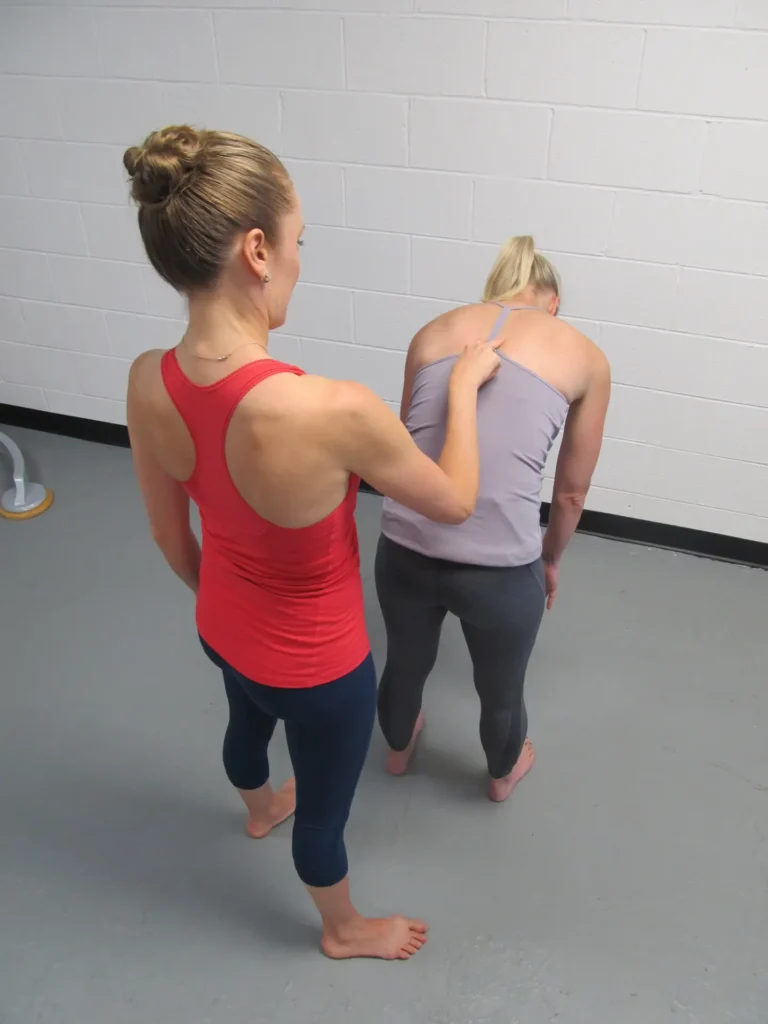
Put your “peace sign” fingers at the top of your client’s neck. Have your client bow their head and slowly roll down through their spine as they reach their hands to their toes. As they do this, follow their spine with your peace sign fingers down to the bottom of their back (sacrum) while applying pressure. This is to assess the lateral shifting of their spine.
Make sure to allow your fingers to shift and rotate with the client’s spine. Don’t try to keep your peace sign fingers in a straight line while going down their back, because you’ll most likely miss the scoliosis. Notice where your fingers deviate from center. Do they deviate off-center one way at the top, and another way at the bottom of the spine? Do they only deviate once and then return to center? Write down what you notice.
Next, have your client stand up straight. Make both of your hands nice and flat, like blades, with your palms facing the floor. Place your hands on their shoulders. Again, have your client roll down. Allow your hands to glide down their back, dropping straight down from their shoulder blades until you reach their sacrum. This is to assess the rotation of their scoliosis.
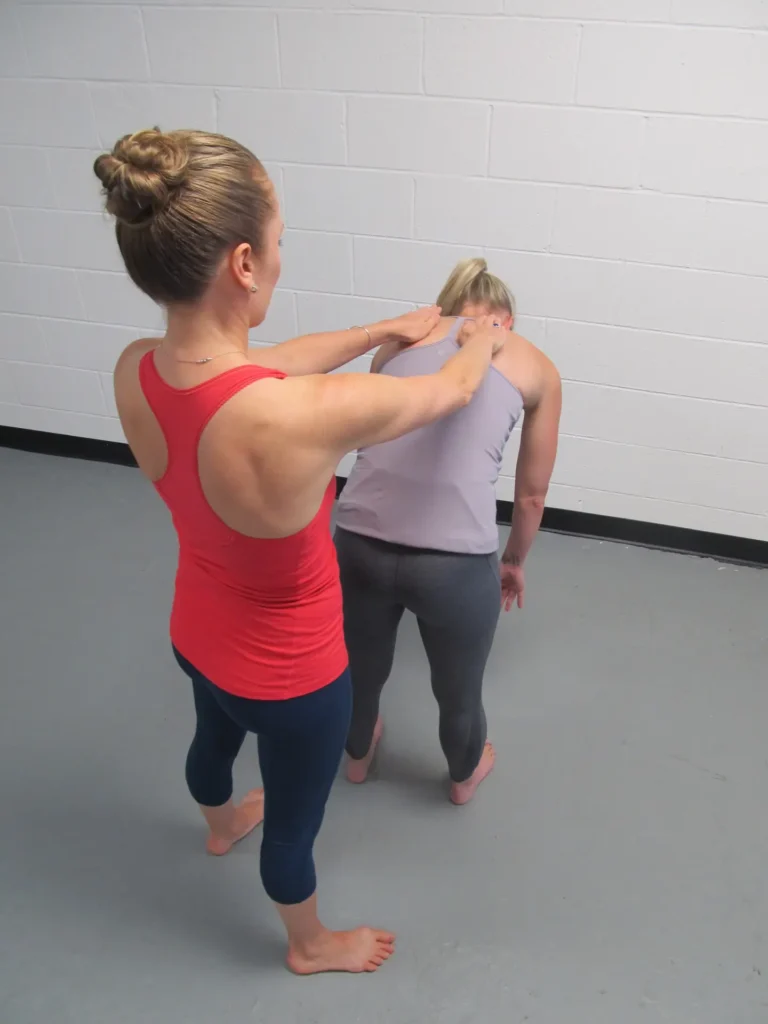
Do you feel one hand higher than the other at certain parts of their back? Does that change as your hands move lower down? When one hand is higher, does it correlate to where the spine is shifting laterally? Start to make mental notes of your observations, then jot down the big things you noticed about their back on a piece of paper or in their client file.
Pelvic Assessment
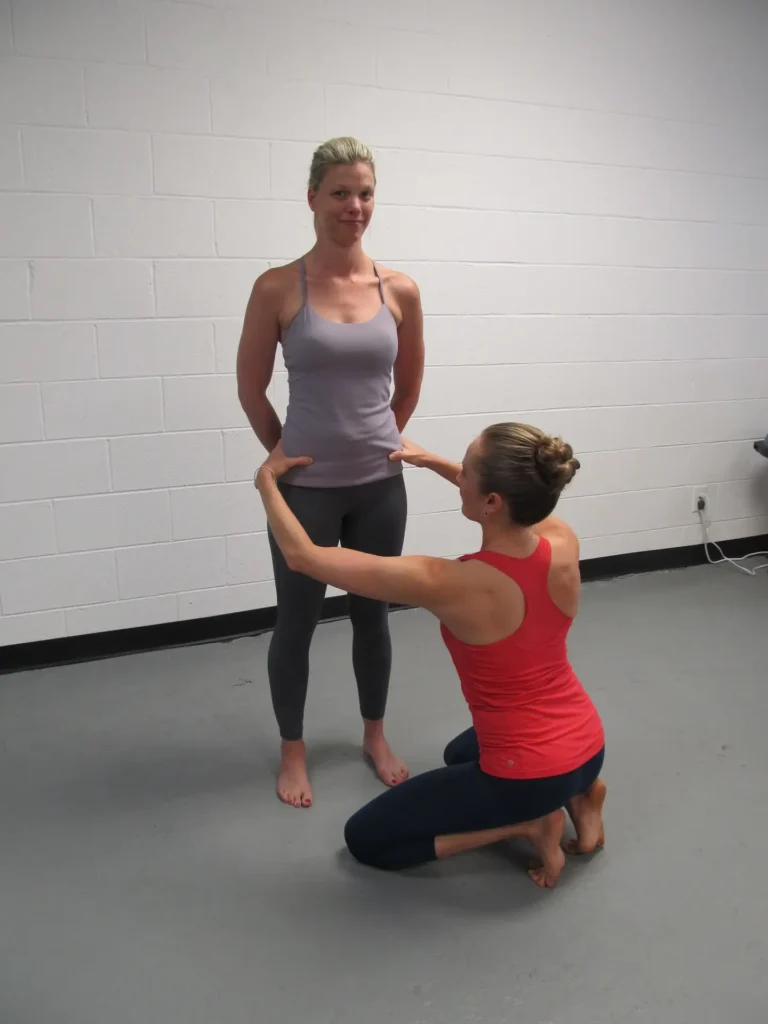
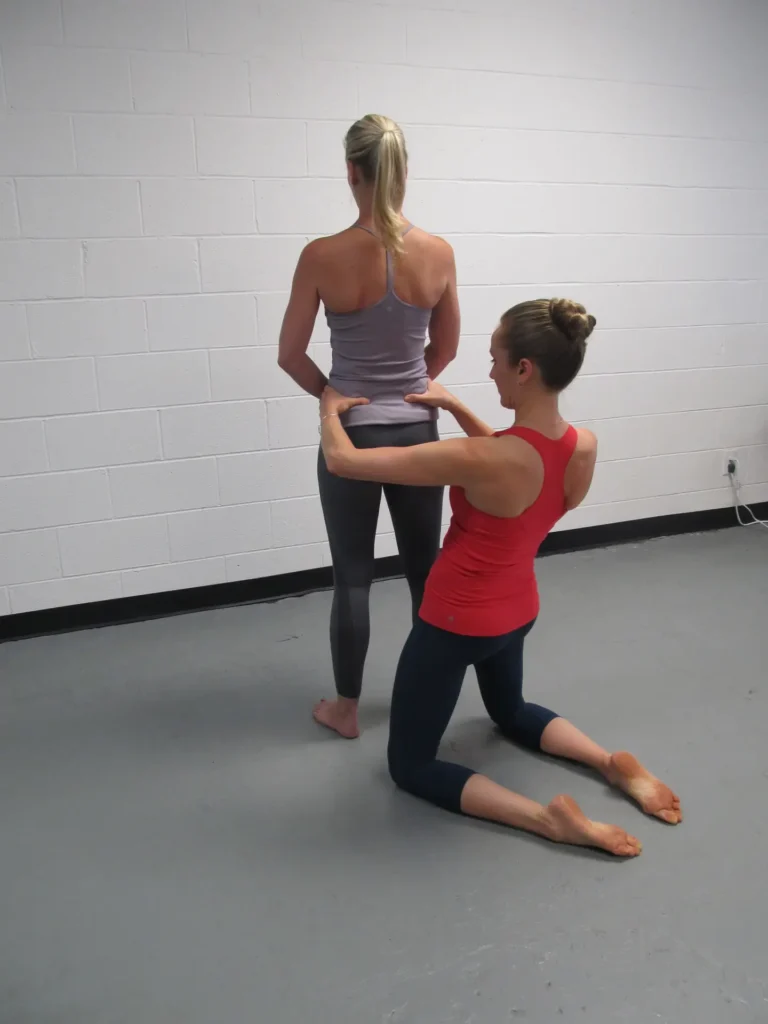
Before touching your client’s pelvis, ask permission to do so. First say, “do you mind if I touch your hip bones?” Once you have permission you may put your hands on your client’s pelvis. If you sensed that they were uncomfortable during your hands-on spinal assessment or when you asked to put your hands on their pelvis, you may also say, “can you put your hands on your hip bones? Good. Now, do you mind if I now put my hands on your hip bones?” Some clients don’t like to have their space invaded, and this can make them feel more comfortable with the hands-on assessment. It may also prevent you from putting your hands all over their pelvis if you aren’t very confident in the location of their ASIS, PSIS, and iliac crests.
Have your client stand about a foot away from you, and face you. Make your hands straight like blades, with your palms facing down. Press your hands in at your client’s waist line and push down until your feel the top of the pelvis (iliac crest). What do you feel? Are your hands the same height or does one feel and look noticeably higher than the other? Make a mental note or jot down what you notice.

Next, place your thumbs on their hip bones (the prominent points of their ASIS on both sides) and wrap the rest of your fingers around their pelvis towards the back. What do you feel under your thumbs? Do the right and left sides feel the same? Does one bone feel higher or lower, protrude more or less, or tilt out or in more than the other? Trust your initial instinct and make a mental note, or jot down what you’re feeling.
Lastly, have your client turn around so their back is facing you. Place your thumbs on the two little bones that feel like marbles at the top, outside parts of their sacrum (PSIS), near their SI joints, then wrap the rest of your fingers around the pelvis towards the front. Again, what do you feel? Assess the same things you did when your client was facing you.
You’ve gotten a 360-degree picture of their pelvis, now put all the pieces together. Did what you felt at the top, front, and back of their pelvis make sense together? What stood out to you? Was one whole pelvic half up, forward, or tilted? Was the entire pelvis rotated in one direction? Try to get a grasp on what the pelvis was doing as a whole. Jot down on a piece of paper what you noticed.
That’s it – the whole physical assessment. However, this is only half of the assessment process. In my next post, I’ll cover the visual part of the assessment process as well as how to put both parts together. In the meantime, I hope you practice physical assessments on your socli clients.